Laravelを使ってお問い合わせフォームを作ります。
バリデーションはLaravelのコントローラー、フォームの状態管理はinertiaのuseFormで行います。
設置するサーバーのメール設定に合わせて、.envに必要な情報を入力しておきます。
ルーティング
web.phpにフォームの表示・送信に関するルーティングを作ります。
Route::get('/contact', [ContactController::class, 'request'])->name('contact.request');
Route::post('/contact', [ContactController::class, 'send'])->name('contact.send');
コントローラー
ContactController.phpを生成しメソッドを追加します。
<?php

namespace App\Http\Controllers;

use App\Http\Requests\ContactFormRequest;
use App\Http\Controllers\Controller;
use Illuminate\Http\RedirectResponse;
use Inertia\Inertia;
use Inertia\Response;
use App\Mail\ContactSendmail;
use Illuminate\Support\Facades\Mail;

class ContactController extends Controller
{
    public function request(): Response
    {
        return Inertia::render('ContactForm');
    }

    public function send(ContactFormRequest $request): RedirectResponse
    {
        $contact = $request->all();

        // ユーザーのアドレスを取得
        $userAddress = $contact['email'];

        // 環境変数から送信元アドレスを取得
        $fromAddress = env('MAIL_FROM_ADDRESS');

        // メールを送信
        Mail::to($userAddress)->cc($fromAddress)->send(new OrderShipped($contact));

        // セッションのトークンを再生成
        $request->session()->regenerateToken();

        return redirect()->route('contact.request');
    }
}
requestはフォームを表示します。
sendはフォームからPOST通信で受け取り、Mailableクラスを使ってメールの送信処理を行います。
リクエスト
contactFormRequest.phpを生成し、POST通信で受け取るデータにバリデーションを追加します。
<?php

namespace App\Http\Requests;

use Illuminate\Foundation\Http\FormRequest;

class ContactFormRequest extends FormRequest
{
    /**
     * Determine if the user is authorized to make this request.
     */
    public function authorize(): bool
    {
        return true;
    }

    /**
     * Get the validation rules that apply to the request.
     *
     * @return array<string, \Illuminate\Contracts\Validation\ValidationRule|array<mixed>|string>
     */
    public function rules(): array
    {
        return [
            'name' => 'required',
            'email' => 'required|email',
            'content' => 'required',
        ];
    }
}
ビュー
resources/Pages/ContactForm.tsxを作成します。
import GuestLayout from "../Layouts/GuestLayout";
import InputError from "../Components/InputError";
import PrimaryButton from "../Components/PrimaryButton";
import TextInput from "../Components/TextInput";
import Textarea from "../Components/Textarea";
import InputLabel from "../Components/InputLabel";
import { Head, useForm } from "@inertiajs/react";
import { FormEventHandler } from "react";
import { Transition } from "@headlessui/react";
export default function ContactForm() {
const { data, setData, post, processing, errors, recentlySuccessful } =
useForm({
name: "",
email: "",
content: "",
});
const submit: FormEventHandler = (e) => {
e.preventDefault();
post(route("contact.send"));
};
return (
<GuestLayout>
<Head title="お問い合わせ" />
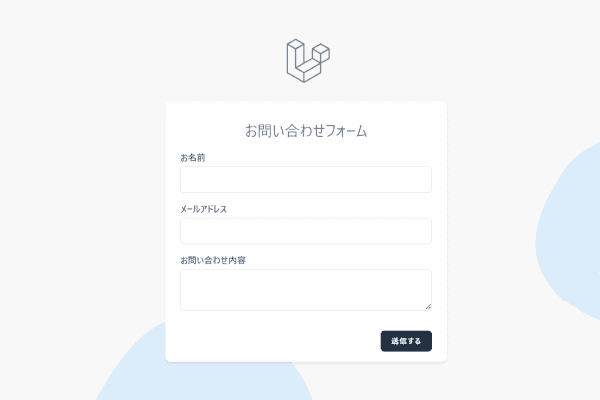
<div className="my-4 text-2xl text-center text-gray-600">
お問い合わせフォーム
</div>
<form onSubmit={submit}>
<InputLabel htmlFor="name" value="お名前" />
<TextInput
id="name"
type="text"
name="name"
value={data.name}
className="mt-1 block w-full"
isFocused={true}
onChange={(e) => setData("name", e.target.value)}
/>
<InputError message={errors.name} className="mt-2 text-red" />
<InputLabel
htmlFor="email"
value="メールアドレス"
className="mt-4"
/>
<TextInput
id="email"
type="email"
name="email"
value={data.email}
className="mt-1 block w-full"
isFocused={true}
onChange={(e) => setData("email", e.target.value)}
/>
<InputError message={errors.email} className="mt-2 text-red" />
<InputLabel
htmlFor="content"
value="お問い合わせ内容"
className="mt-4"
/>
<Textarea
id="content"
name="content"
value={data.content}
className="mt-1 block w-full"
isFocused={true}
onChange={(e) => setData("content", e.target.value)}
/>
<InputError
message={errors.content}
className="mt-2 text-red"
/>
<div className="flex items-center justify-end mt-8">
<Transition
show={recentlySuccessful}
enterFrom="opacity-0"
leaveTo="opacity-0"
className="transition ease-in-out"
>
<p className="text-sm text-gray-600">送信しました!</p>
</Transition>
<PrimaryButton className="ms-4" disabled={processing}>
送信する
</PrimaryButton>
</div>
</form>
</GuestLayout>
);
}inputが空欄のまま、またはemailの値がメールアドレスでない場合、ボタンを押しても送信されずエラーメッセージが表示されます。
送信が成功するとボタン横にフラッシュメッセージが表示されます。
自動送信メールの本文はresourses/views/mail.blade.phpに作成します。
<!DOCTYPE html>
<html>
<head>
    <title>お問い合わせありがとうございます</title>
</head>
<body>
    <h1>お問い合わせありがとうございます!</h1>
    <p>内容を確認し返信しますのでお待ちください。</p>
    <p>------------------------------------------</p>
    <p><strong>Name:</strong> {{ $name }} さま</p>
    <p><strong>Email:</strong> {{ $email }}</p>
    <p><strong>Message:</strong> {{ $content }}</p>
</body>
</html>
Malableクラス
最後に送信処理を行うクラスを生成します。
sail artisan make:mail OrderShipped生成されたファイルは以下のように記述します。
<?php

namespace App\Mail;

use Illuminate\Bus\Queueable;
use Illuminate\Mail\Mailable;
use Illuminate\Mail\Mailables\Content;
use Illuminate\Mail\Mailables\Envelope;
use Illuminate\Queue\SerializesModels;
use Illuminate\Mail\Mailables\Address;

class OrderShipped extends Mailable
{
    use Queueable, SerializesModels;

    // メールに関するデータを保存するためのプライベートプロパティ
    private $name;
    private $email;
    private $content;

    /**
     * Create a new message instance.
     * $contact配列からname, email, contentを取り出してMailクラスのプロパティにセット
     */
    public function __construct($contact)
    {
        //
        $this->name = $contact['name'];
        $this->email = $contact['email'];
        $this->content = $contact['content'];
    }

    /**
     * Get the message envelope.
     * メールの送信者、返信先、件名などを設定するメソッド
     */
    public function envelope(): Envelope
    {
        $fromAddress = env('MAIL_FROM_ADDRESS');

        return new Envelope(
            from: new Address($fromAddress, 'risu'),
            replyTo: [
                new Address($this->email, $this->name)
        ],
            subject: 'Contact Sendmail',
        );

    }

    /**
     * Get the message content definition.
     * メールの内容を設定するメソッド(viewはmail.blade.php、withはviewに渡すデータ)
     */
    public function content(): Content
    {
        return (new Content())->view('mail')
                          ->with([
                              'name' => $this->name,
                              'email' => $this->email,
                              'content' => $this->content,
                          ]);
    }
これでお問い合わせフォームの完成です!
デプロイして送信すると自動返信メールが届きます。